

Step 1: Start Your FiveM Server
When you start your FiveM server for the first time, txAdmin will automatically initialize. Look for the console output that displays important information.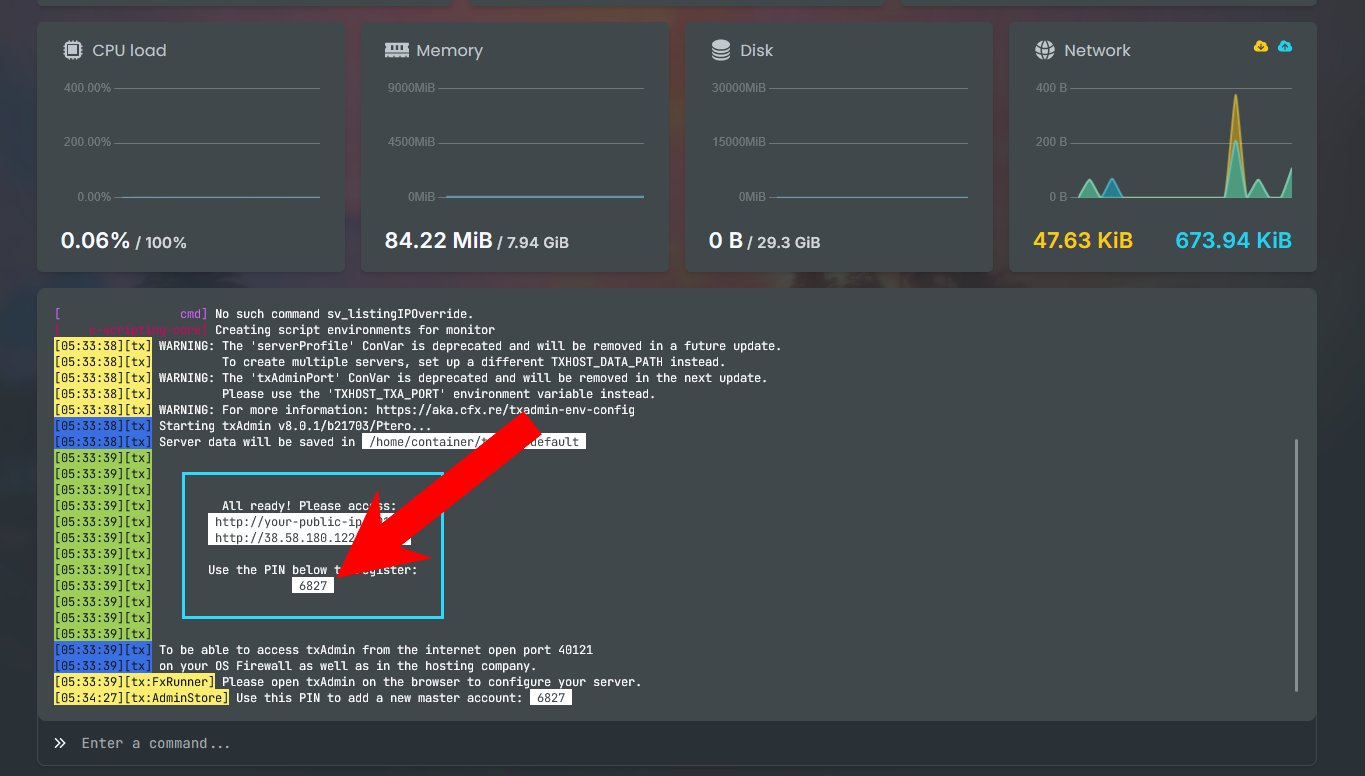
Make sure to note down the PIN code - you’ll need it in the next step to set up your master account.
Step 2: Access the txAdmin Panel
Copy the url that includes the ip address displayed in your console and paste it into your web browser.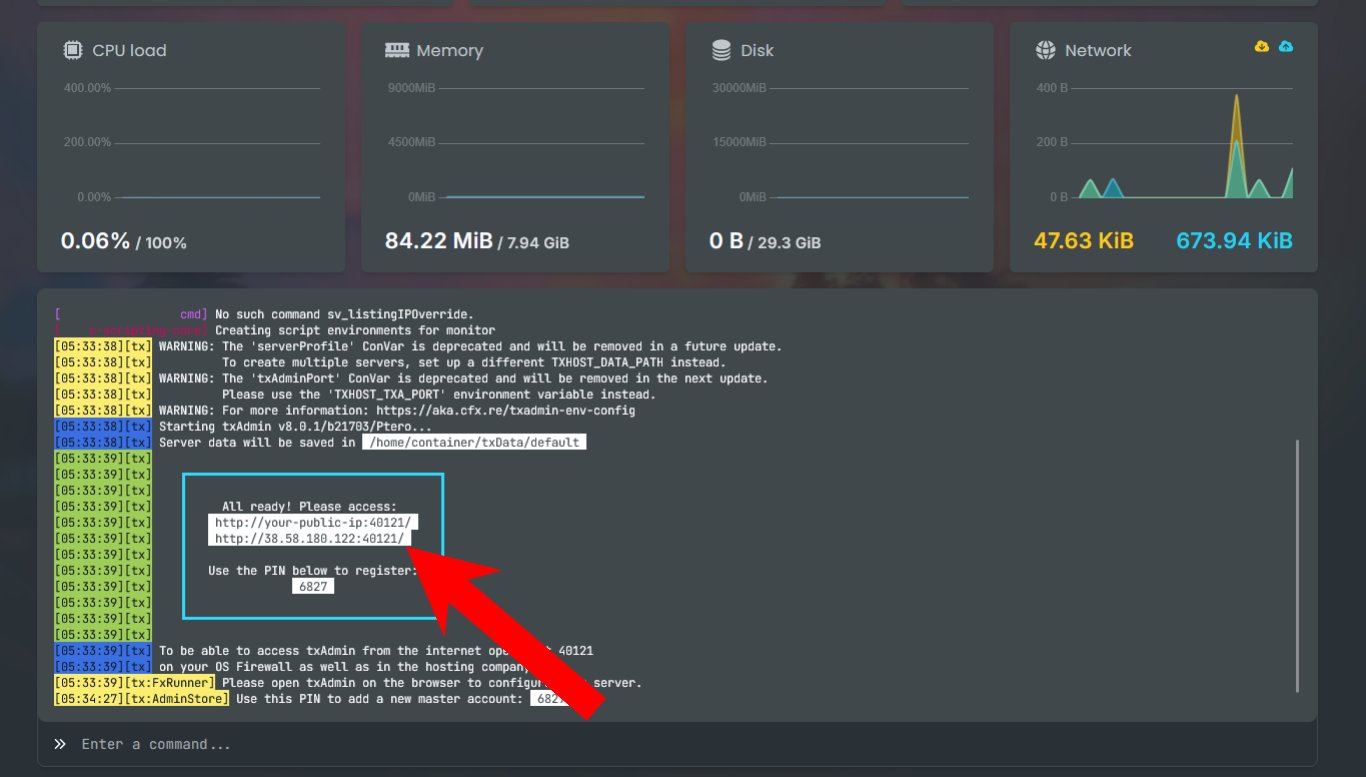
Step 3: Configure Your Server Name
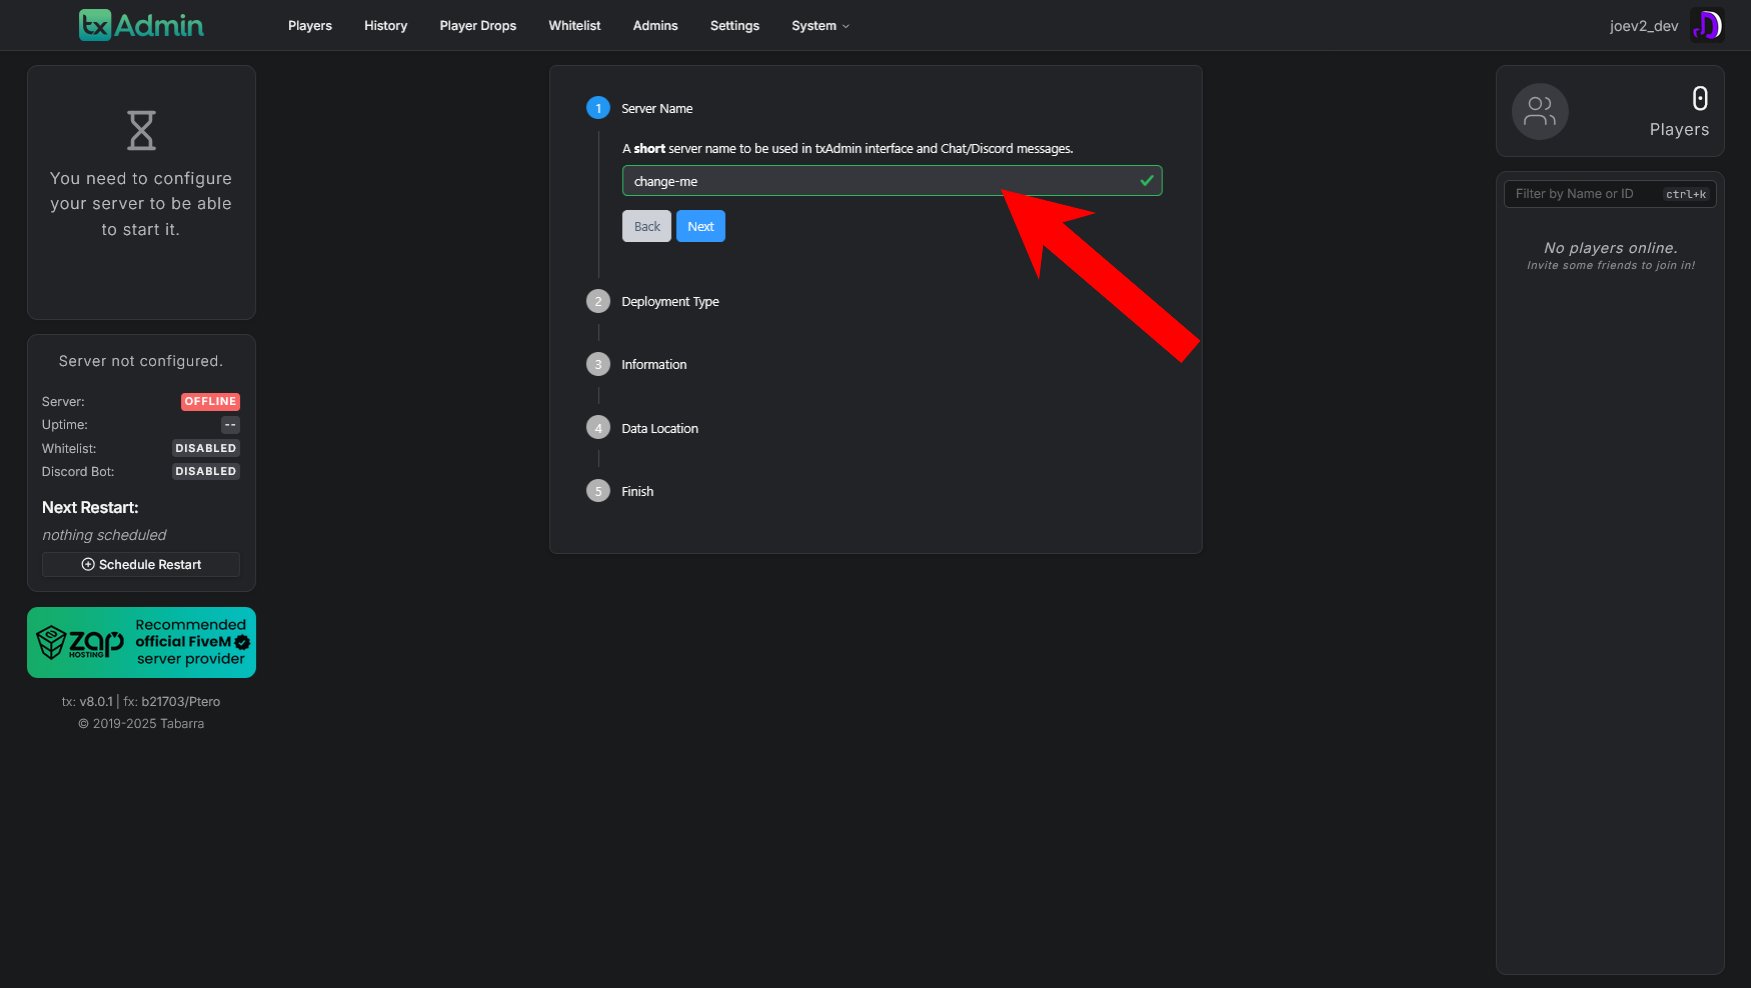
After accessing the txAdmin panel, you’ll be prompted to set up your server configuration. Choose a short, memorable server name that will be used in the txAdmin interface and Chat/Discord messages (e.g.,tutorial, examplerp, dev).
Step 4: Choose Your Deployment Type
Next, you’ll need to select how you want to set up your server. txAdmin offers several deployment options: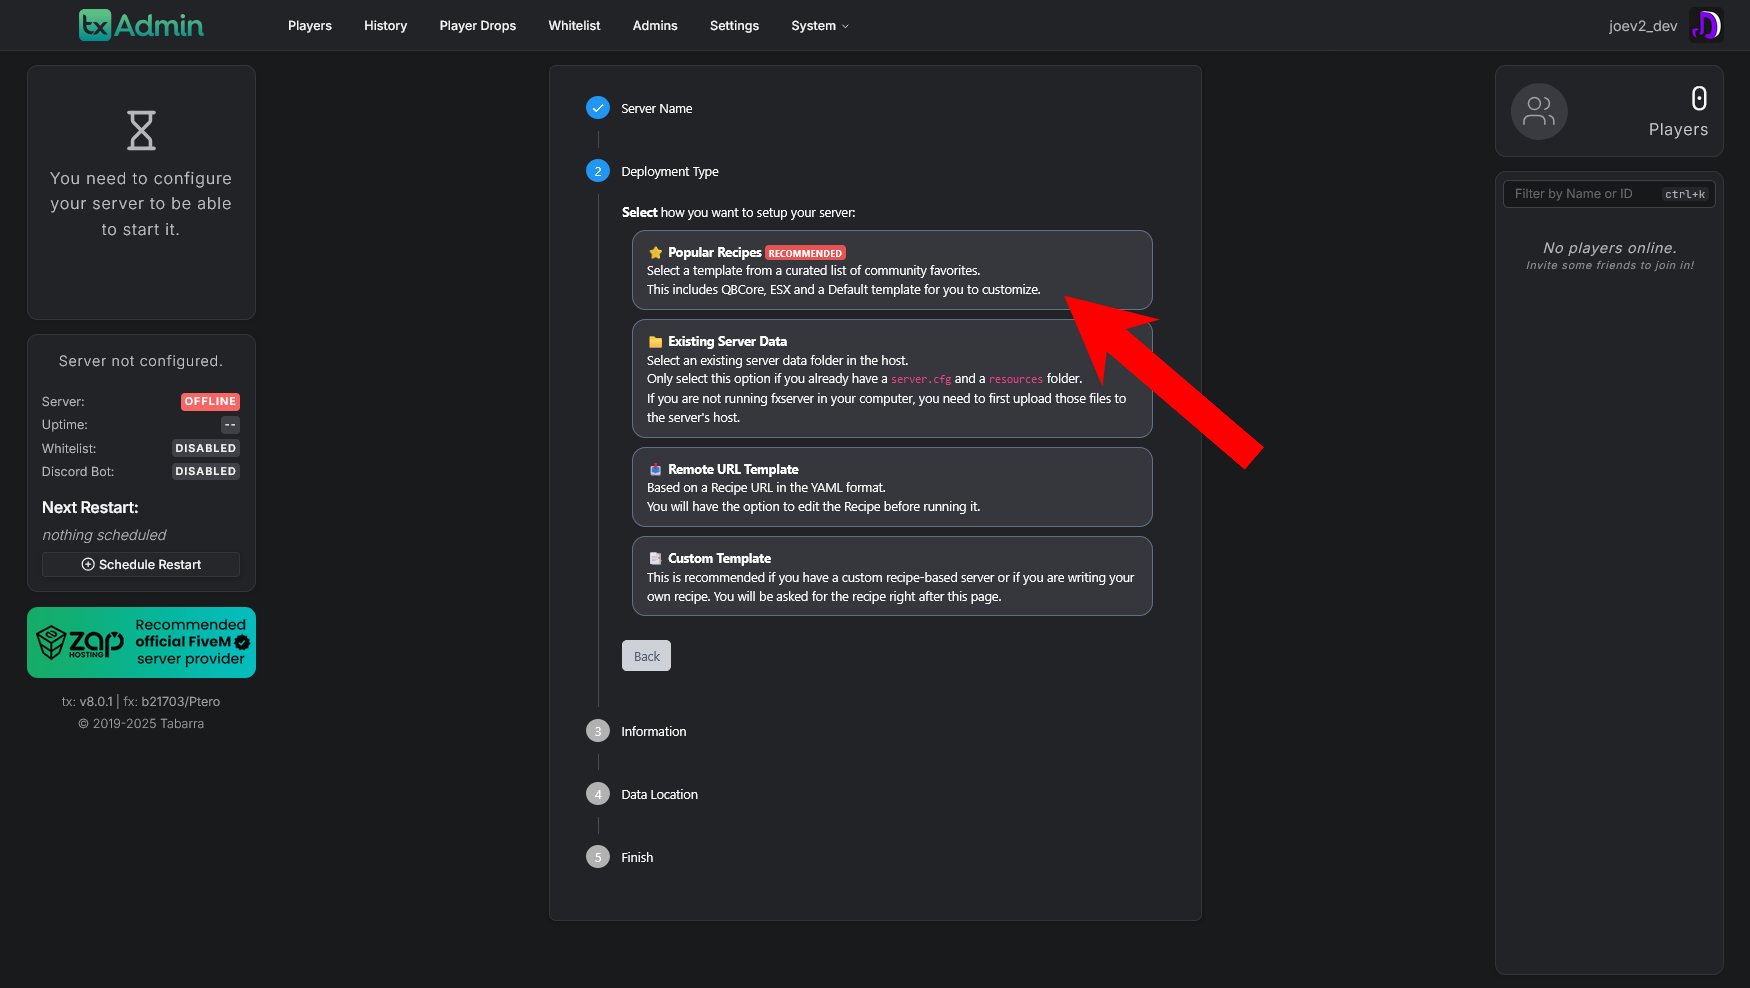
Popular Recipes (Recommended)
This is the easiest option for beginners. Select a template from a curated list of community favorites. This includes QBCore, ESX, and a Default template for you to customize.Other Deployment Options:
-
Existing Server Data: Select an existing server data folder on the host. Only use this if you already have a
server.cfgand aresourcesfolder. - Remote URL Template: Based on a Recipe URL in the YAML format. You’ll have the option to edit the Recipe before running it.
- Custom Template: Recommended if you have a custom recipe-based server or if you are writing your own recipe. You will be asked for the recipe right after this page.
For most users, Popular Recipes is the recommended choice as it provides tested and working server configurations.
Step 5: Review Recipe
After selecting your deployment type, you’ll be presented with the recipe configuration. This shows you the YAML configuration that will be used to set up your server.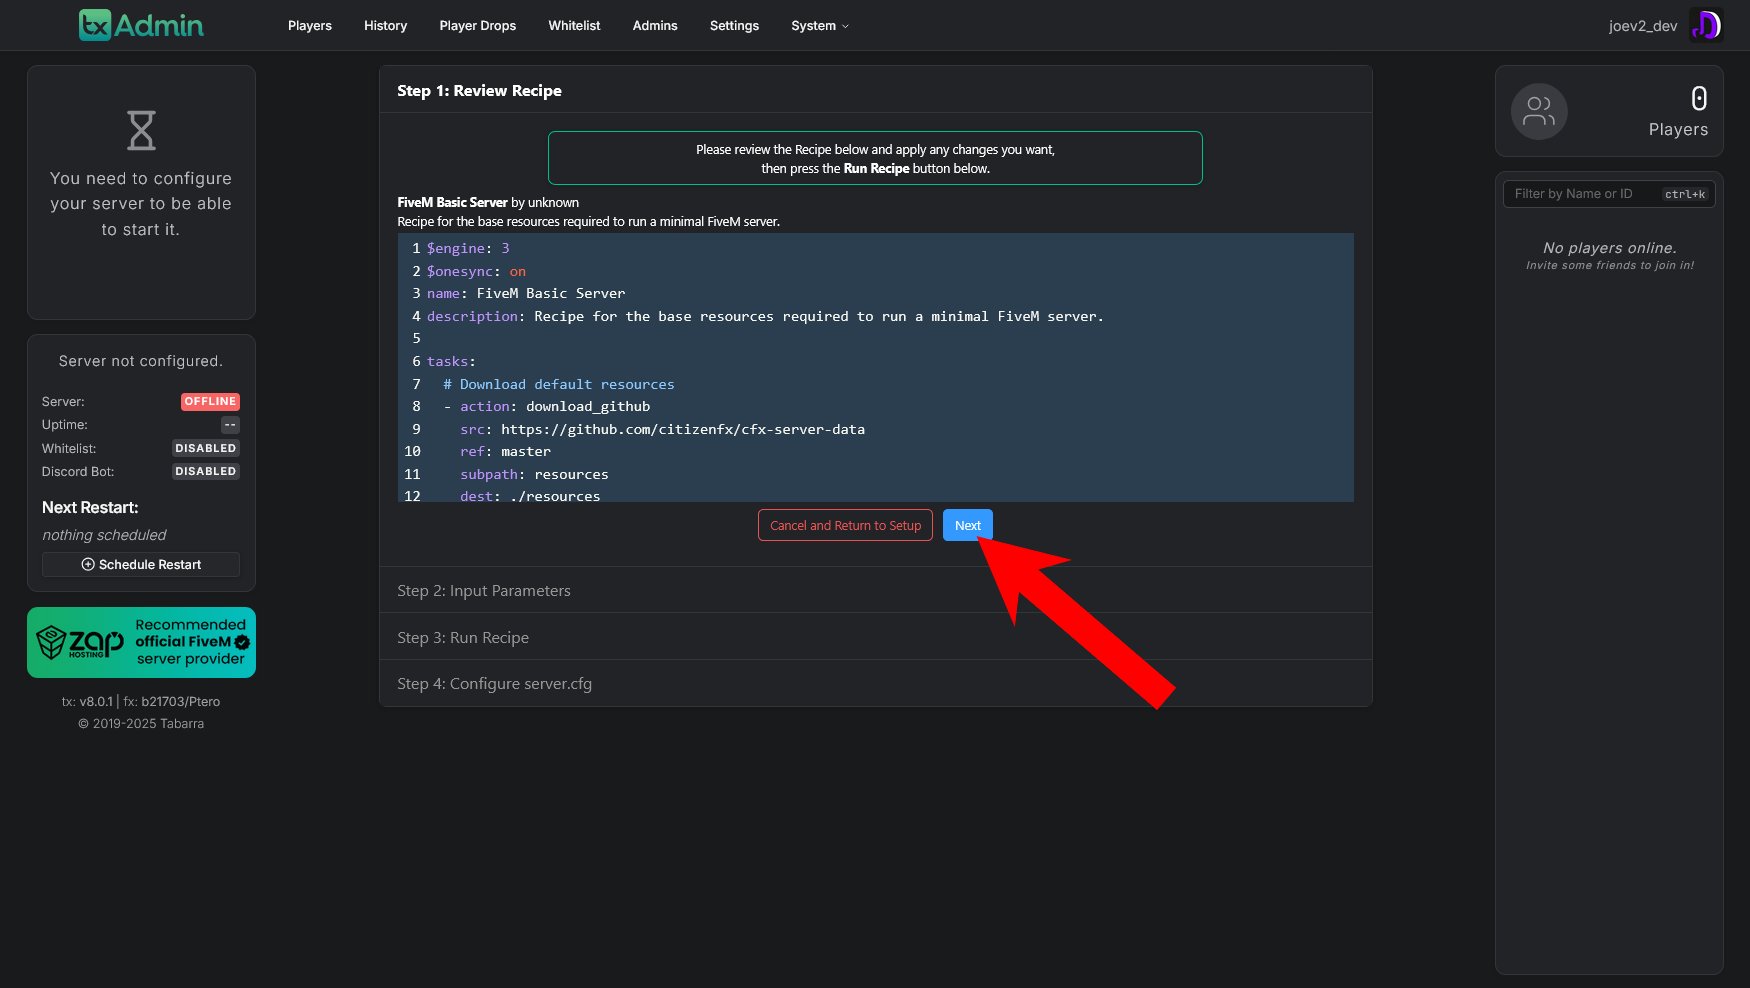
- Engine version (e.g.,
$engine: 3) - Server name and description
- Tasks that will be executed (downloading resources, configuring files, etc.)
- Source repository information (where resources will be downloaded from)
Step 6: Enter Server Registration Key
Now you need to enter your FiveM Server Registration Key (formerly known as License Key). This key is required to run a FiveM server.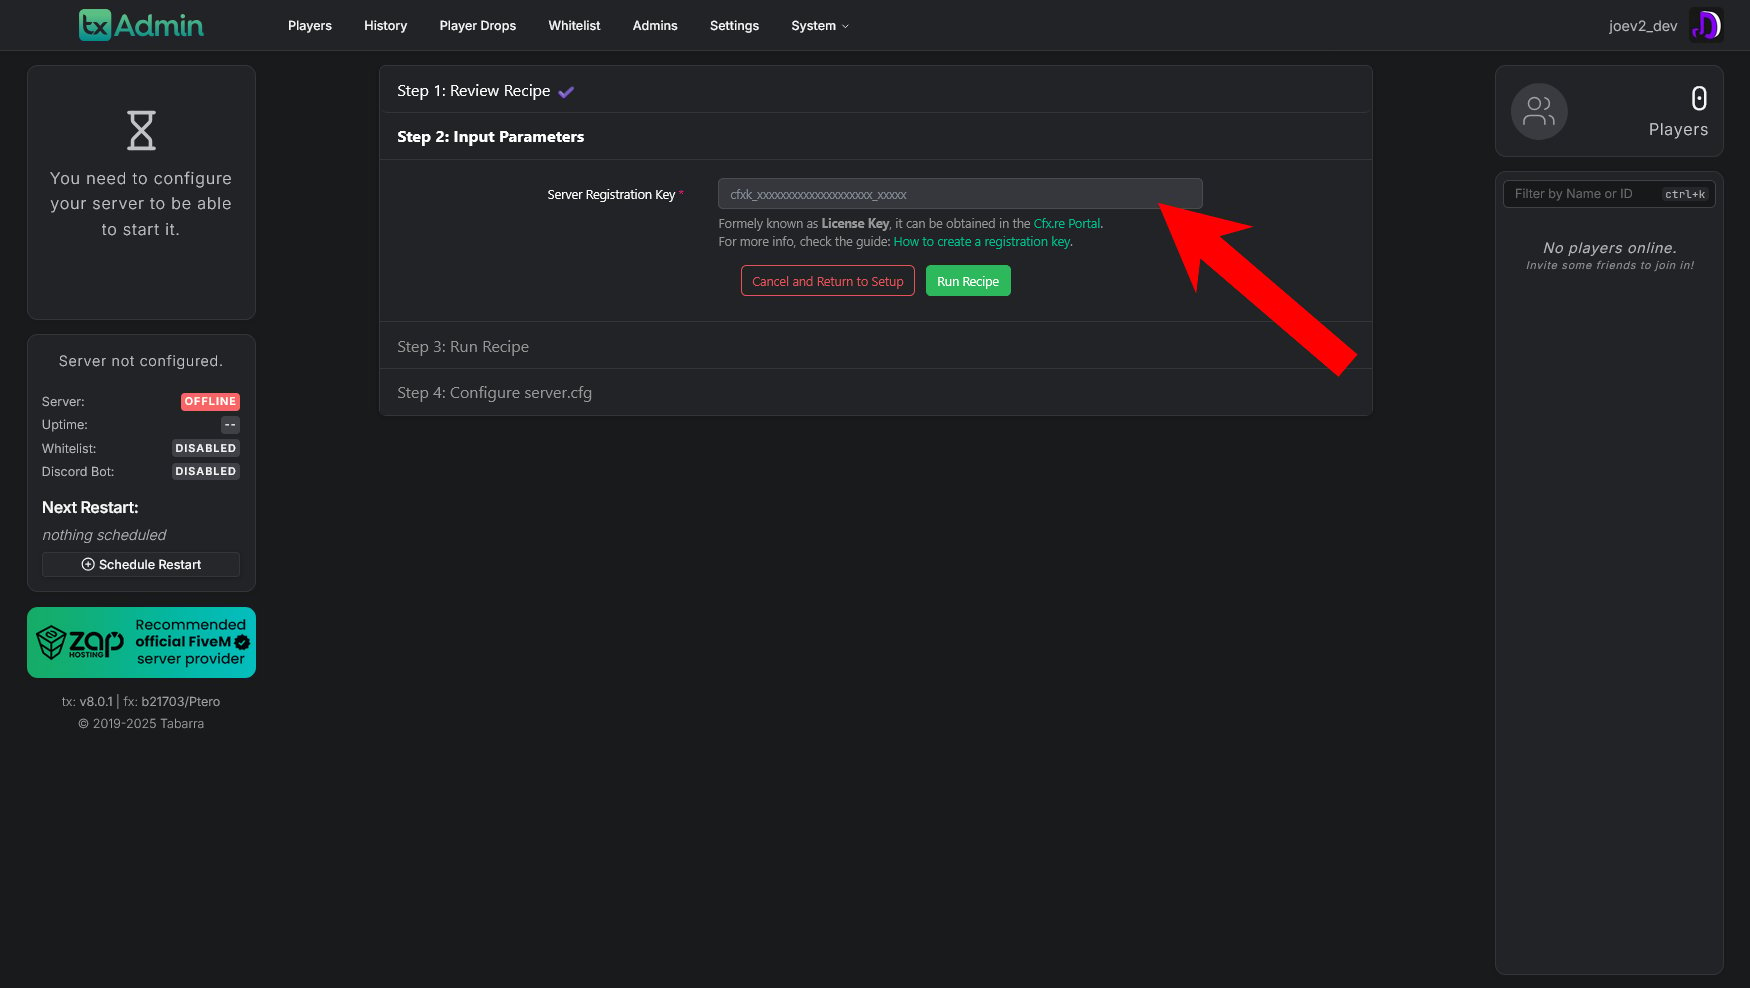
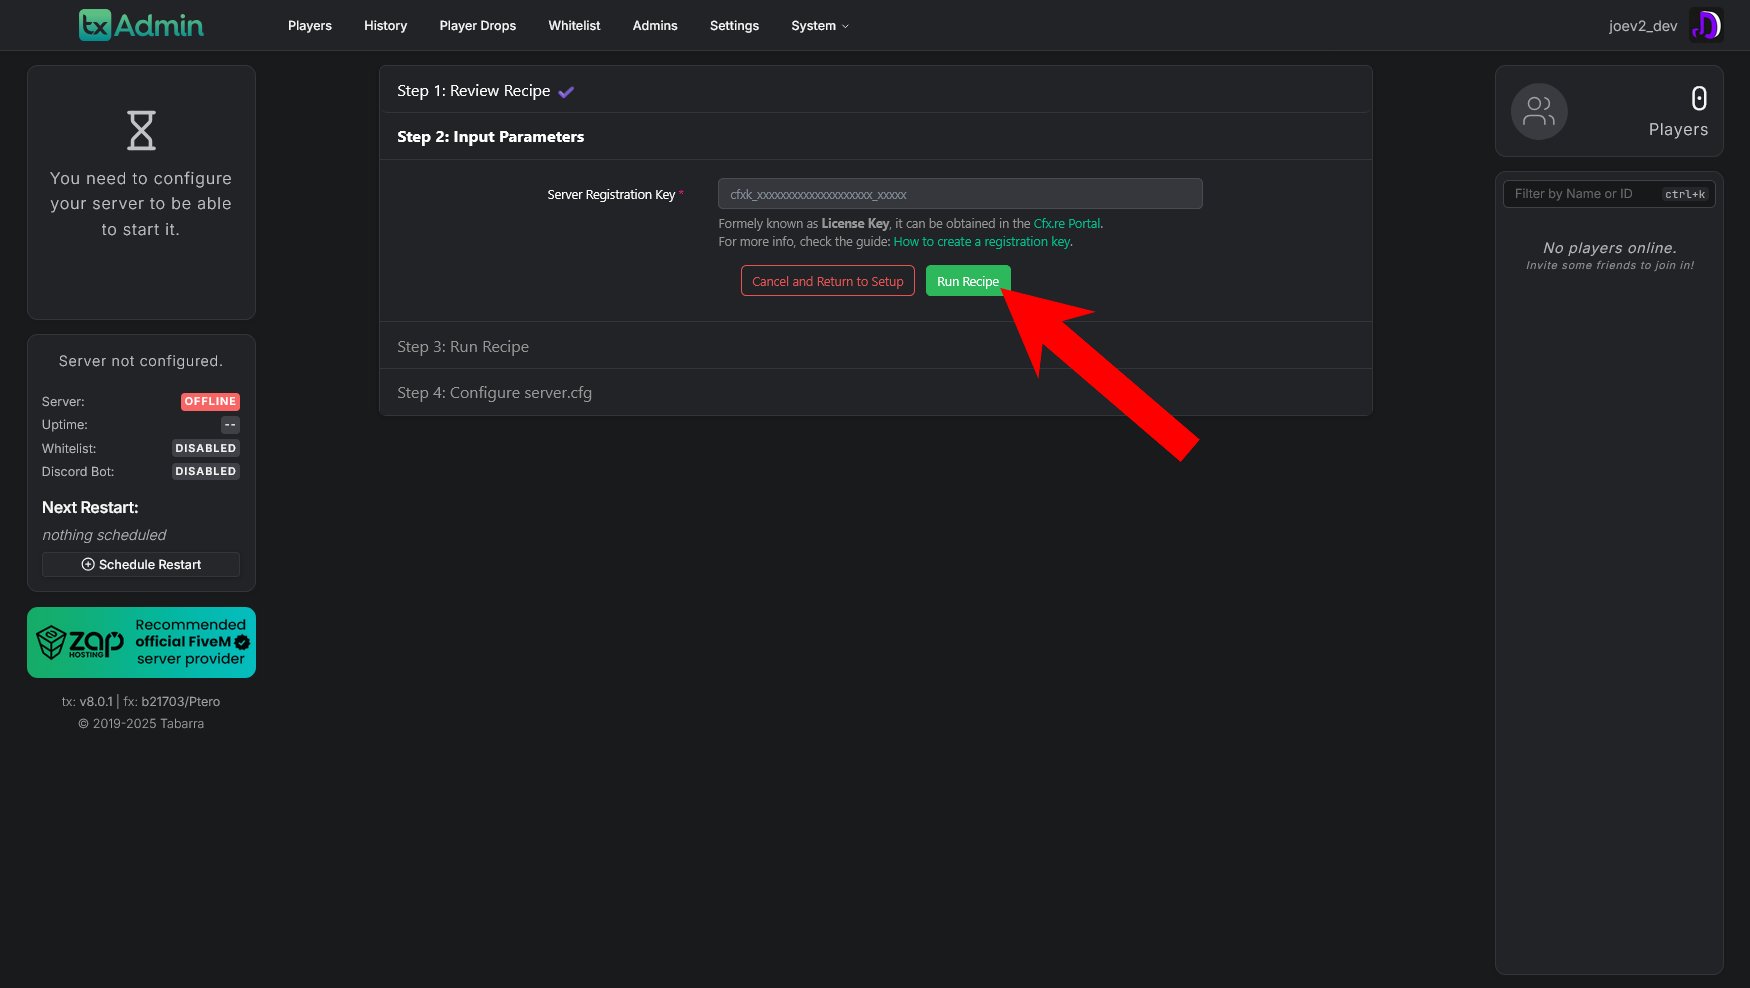
If you don’t have a registration key yet, visit the Cfx.re Portal to create one. For more information, check the guide: How to create a registration key.
Step 7: Configure server.cfg
After the recipe runs, you’ll be presented with theserver.cfg file editor. This is your server’s main configuration file where you can customize various settings.
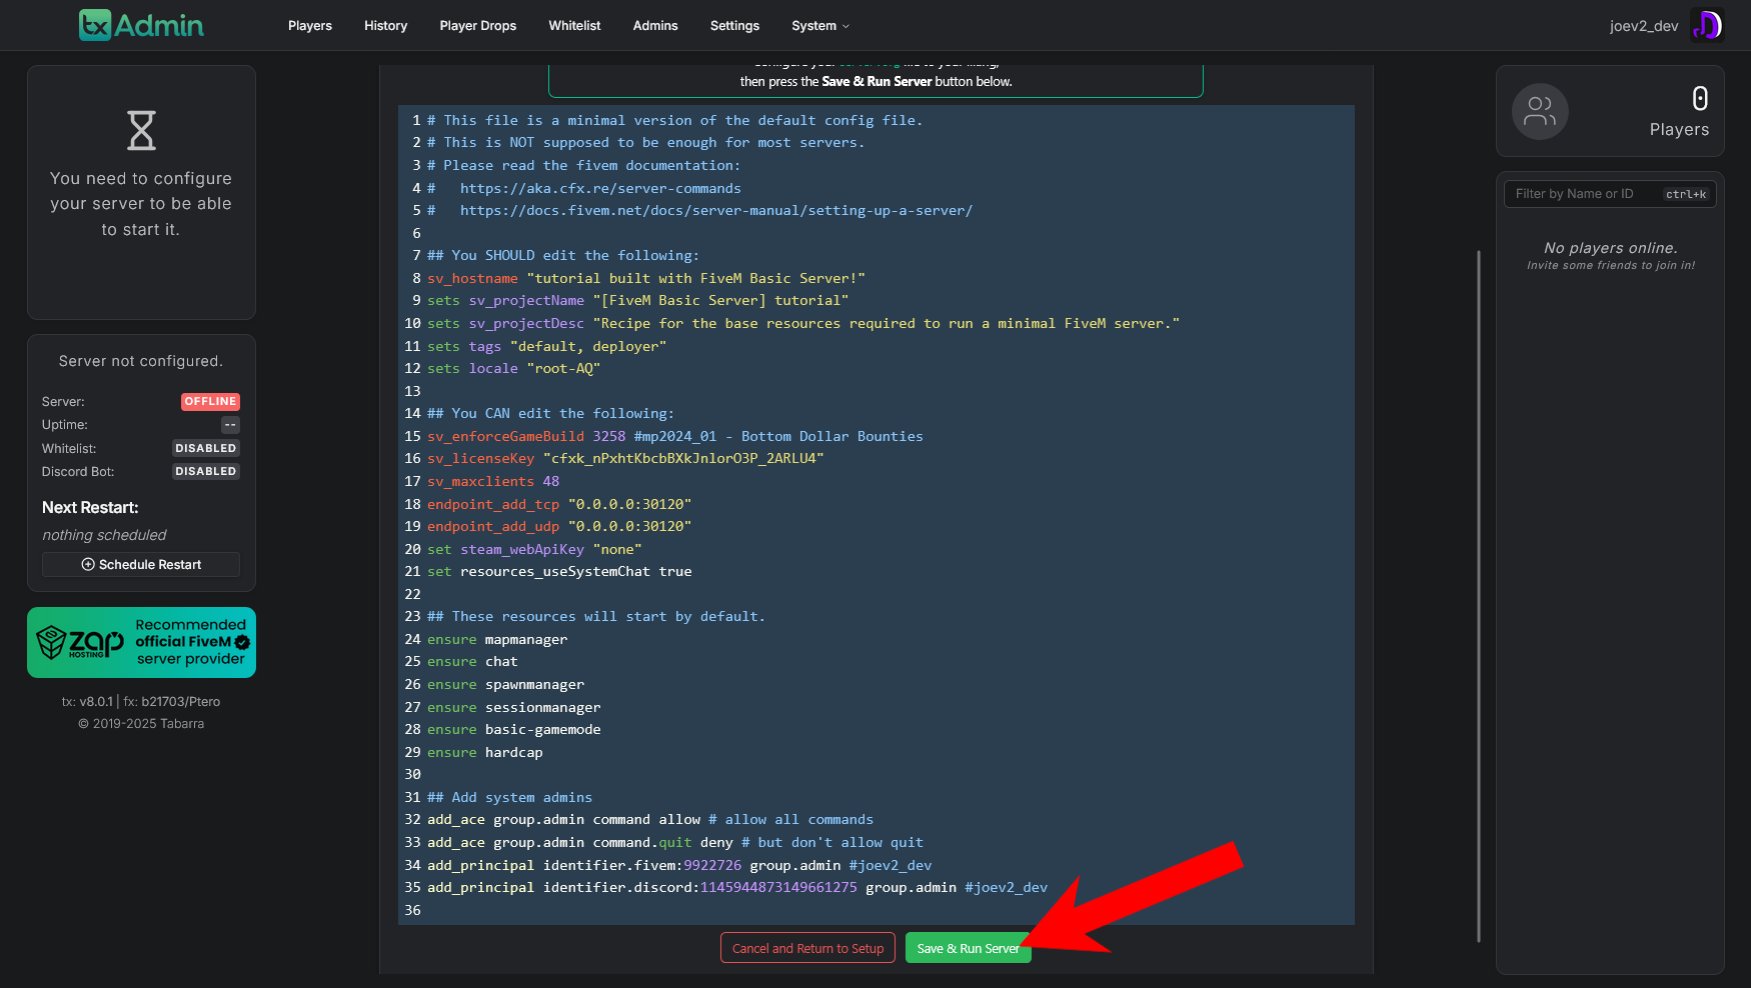
Congratulations! If you’ve followed all the steps correctly, your FiveM server should now be up and running. You can access your txAdmin panel to manage your server, view players, and configure additional settings. Everything should be good to go!